

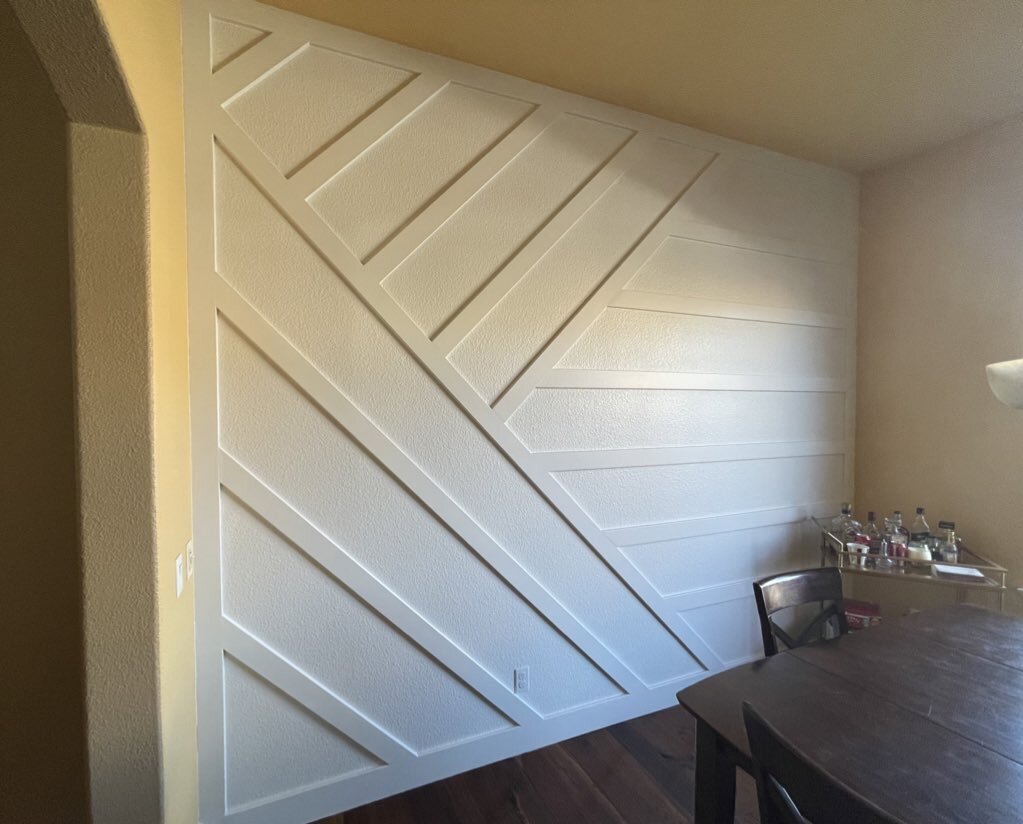
My wife and I wanted a fresh approach to our dinning room. So after reviewing many different inspiration ideas, we settled on building a geometric accent wall. We decided that rather than just painting the geometric design on the wall, that we would build a 3-D version on top of the wall. We think it turned out awesome! I’ll highlight the process we used, materials and tips and tricks below. Hope you find this helpful and inspirational to tackle your own geometric accent wall!
Design
We saw a design that we liked while pursing the inter-webs (as one does) and make a few design tweaks and sketched it out on paper. We liked the idea of having crisp and repeating lines, but not necessarily all 90 degree angles. That’s how we settled on the design we used.
Process
We started the geometric accent wall by removing the existing baseboard on the dining room wall where we were going to build the accent wall. We built the project using pre-primed MDF trim boards. They come with a nice round over from the factory. We liked the idea of having that round over on the final design and this saved a step at the router table if we were to have used real wood. MDF is pretty nasty stuff to cut, so make sure you wear your PPE when doing so.

Speaking of cutting. There are a lot of miter cuts involved in this process. I HIGHLY suggest finding a miter saw to use if you don’t already own one. This could be done with one of those miter box saw contraptions, but I don’t recommend it.
Once we had the old baseboard off the wall, we installed a new baseboard that was a simple rectangle design. No decorative cures on the top part of the baseboard. This was intentional so that when we installed the geometric accent pieces, they would sit flush against the square top of the new baseboard.
The next step is to use your imagination (or Pinterest! https://www.pinterest.com/pin/497366352606955482/ ) and come up with a geometric accent wall design that you like. I can tell you, a design that has even spacing between each of the boards will save you some headache when it comes to laying out the design.
Mark the studs
Then it’s time to mark the studs on the walls. Here is a link to a good one: (stud finder: https://amzn.to/2P5ENbd) When building a geometric accent wall like this, it is helpful to mark the stud locations from the top all the way down to the bottom of the wall. That way, no matter where the boards fall on the wall, you have a reference line of where the studs are located.
Start Cutting
I found that the best way to get exact cuts is to measure the required length for the board and add a few inches. Cut the board to a manageable length, but a bit long. Then take the board and hold it up to the exact location where it is going to go, and mark where the miter cuts need to be. Then make your miter cuts just BARELY on the long side of the line. The board should fit snug and perfectly into its location. Here is a link to the miter saw I use: https://amzn.to/37HfZge and a more entry-level saw too: https://amzn.to/3pKcxHN
Glue and Nail
Once you have the board cut to a perfect length, it’s time to apply some glue (liquid nails: https://amzn.to/3sjfAZ3) and brad nail them into the studs. If you don’t have a brad nailer, there are a couple of options for you: pneumatic nailer and air compressor or a battery operated nailer. Examples below:
Brad nails: https://amzn.to/2ZhfEfE
Ridgid pneumatic brad nailer: https://amzn.to/3dbbNbT
Makita Air Compressor: https://amzn.to/37EFfDI
Ryobi Airstrike Nailer: https://amzn.to/37EjJPy

Caulk the Joints
Then you will want to apply a bead of caulk to all the joints between the newly installed boards and the existing wall. This will provide a seamless “finished” look. Cut a very small slice off the tip of the tube of caulk and use a caulking gun to apply. Wipe away any excess. A damp rag will aid in cleaning up any excess product.
Fill the Nail Holes
In order to get the best looking geometric accent wall possible, you will want to use some kind of wood filler to fill all the brad nail holes and gaps between any boards. I had good success with DAP Plastic Wood-X: https://amzn.to/3rSutkO. I recommend applying a liberal amount, letting it harden and then sanding it away. You will need a puddy knife and a sanding sponge for this step.
Puddy knife: https://amzn.to/3sjL6Gt
Sanding sponge: https://amzn.to/3sd0HYe
Prime and Paint

Now you are done with the construction phase of the project and it’s time to start the paint. Some people might want to paint the wall itself first at the beginning of the project, but we wanted to have a look at how it was turning out before we decided on a paint color. Either way, you will probably want/need to apply a coat or two of primer before your color of choice. I recommend Zinsser 123 primer https://amzn.to/37f6epj. The color you are painting over will dictate how many coats of primer you need. Once the primer is applied and dry you can apply your final color choice. Paint brand, sheen and color are all personal choices, but we used Benjamin Moore brand paint for our wall. I recommend using a foam roller for painting on the MDF trim boards, a thicker nap roller if you have a textured drywall like we did, and a brush for getting in the nooks and crannies.
Foam paint roller: https://amzn.to/3b2R9YV
Longer nap roller: https://amzn.to/3pf31w9
Purdy paint brushes: https://amzn.to/37d0QTq
I hope this helps inspires you and gives you the confidence you need to go and tackle this project on your own! I can say that this project completely changed the feel of our dining room (and whole house really) for the better. If you are on the fence, go for it!
Let me know through the contact page if you have any questions on the build process. Cheers!